Danby Dishwasher Manual: A Comprehensive Guide
Welcome! This manual provides detailed instructions for Danby dishwasher models, including the DDW621WDB and DDW1805EWP, ensuring optimal performance and longevity.
Danby has established itself as a trusted name in home appliances, offering a diverse range of dishwashers designed to meet various needs and kitchen spaces. From compact, countertop models like the DDW621WDB – perfect for smaller households or limited areas – to full-size 18” and 24” dishwashers, Danby prioritizes both convenience and efficiency.

These dishwashers are engineered with features like electronic LED displays for easy cycle selection and monitoring, and are designed to conserve water, utilizing as little as 3.1 gallons (11.7 liters) per normal cycle. Danby dishwashers aim to simplify your kitchen routine, providing reliable cleaning performance while minimizing environmental impact. This manual will guide you through the specifics of operation, maintenance, and troubleshooting, ensuring years of dependable service from your Danby dishwasher.
Understanding Your Danby Dishwasher Model
Danby dishwashers come in various sizes and configurations, each tailored to specific kitchen layouts and dishwashing demands. The DDW621WDB is a compact, 6-place setting countertop unit, ideal for individuals or small families. Conversely, the DDW1805EWP is an 18” model offering increased capacity while still fitting neatly into tighter spaces.
Larger 24” Danby dishwashers provide maximum cleaning power and space for larger households. Regardless of the model, all Danby dishwashers feature intuitive electronic LED displays, allowing for easy selection of six distinct wash cycles. Familiarizing yourself with your specific model’s features, dimensions, and cycle options – as detailed in this manual – will ensure optimal performance and efficient operation. Understanding these nuances will maximize your dishwashing experience.
Safety Precautions & Important Warnings
Prioritize safety when installing and operating your Danby dishwasher. Always disconnect the electrical supply before performing any maintenance or repairs. Never use extension cords; ensure proper grounding to prevent electrical shock. Keep children and pets away from the dishwasher during operation, as internal surfaces can become hot.
Caution: Do not attempt to repair the dishwasher yourself. Contact qualified service personnel for assistance. Only use detergents and rinse aids specifically designed for dishwashers. Avoid storing flammable materials near the unit. Inspect the water supply and drain hoses regularly for leaks or damage. Failure to adhere to these warnings could result in injury or damage to the appliance. Read all instructions carefully before use.

Installation & Setup
Proper installation is crucial for optimal performance. This section details unpacking, water and electrical connections, and ensuring the dishwasher is perfectly leveled.
Unpacking and Initial Inspection
Carefully unpack your new Danby dishwasher, ensuring you have ample space to avoid damaging the unit or your flooring. Begin by removing all external packaging materials, including cardboard, plastic wrap, and tape. Inspect the dishwasher thoroughly for any signs of shipping damage, such as dents, scratches, or broken components.
Compare the contents of the box with the included parts list to verify that all accessories are present. These typically include the power cord, water supply line, drain hose, and installation hardware. Retain the packaging materials for potential future transport or warranty claims.
Report any damage immediately to the retailer and Danby customer support. Do not attempt to operate a damaged dishwasher. Remove any protective films from the control panel and interior surfaces. Ensure the interior is free of packing materials before proceeding with installation. A visual check will prevent issues later.
Water Supply Connection
Connect the dishwasher to a potable water supply line with sufficient pressure (minimum 30 PSI, maximum 120 PSI). Use a new water supply hose; do not reuse old hoses. Ensure the water supply valve is readily accessible for shut-off during maintenance or emergencies.
Attach the water inlet hose to the dishwasher’s water inlet valve, tightening securely by hand, then using a wrench to give it an additional quarter turn. Avoid over-tightening, which can damage the valve or hose. Check for leaks at the connection point after turning on the water supply.
Consider using a water hammer arrestor to prevent banging noises in the pipes. Follow local plumbing codes and regulations when making the water connection. If using an existing water line, ensure it is compatible with the dishwasher’s connection type. A proper seal is crucial.
Electrical Requirements & Grounding
Danby dishwashers require a dedicated 120V, 60Hz electrical circuit. Do not use an extension cord or adapter plug. The dishwasher must be properly grounded to prevent electrical shock. Ensure the electrical outlet is compatible with the dishwasher’s plug.
A qualified electrician should perform the electrical installation if you are unsure about any aspect of the process. Verify the circuit breaker is appropriately sized for the dishwasher’s power consumption (typically 15 amps). Never modify the power cord or plug.
Improper grounding can result in a hazardous situation. Inspect the power cord regularly for damage and replace it if necessary. Before performing any maintenance, disconnect the dishwasher from the power supply. Adherence to electrical safety guidelines is paramount for safe operation.
Leveling the Dishwasher
Proper leveling is crucial for optimal dishwasher performance. An unleveled unit can cause water pooling, noisy operation, and inefficient cleaning. Use a bubble level to check the dishwasher’s stability, placing it on both the side-to-side and front-to-back axes.
Adjust the leveling legs located at the base of the dishwasher. Rotate the legs clockwise to lower the unit and counterclockwise to raise it. Make small adjustments to each leg until the dishwasher is perfectly level. Ensure all legs are firmly in contact with the floor.
After leveling, gently rock the dishwasher to confirm its stability. Re-check the level after making adjustments. A properly leveled dishwasher will operate quietly and efficiently, delivering sparkling clean dishes every time. Consistent monitoring of the leveling is recommended.
Operating Instructions
Explore efficient dishwashing! This section details how to utilize your Danby dishwasher’s features, including cycle selection, loading, and detergent usage for optimal results.
Control Panel Overview (LED Display)
Navigating the Control Panel: Your Danby dishwasher features an intuitive electronic LED display for effortless operation. The display clearly indicates the selected wash cycle, remaining time, and any active error codes. Powering on the unit initiates the display, showcasing the default cycle.
Cycle Selection Buttons: Dedicated buttons allow you to easily choose from six distinct wash cycles, catering to various load types and soil levels. These cycles are clearly labeled for quick identification.
Delay Start Function: A delay start option enables you to program the dishwasher to begin operation at a later, more convenient time, potentially taking advantage of off-peak energy rates.
Indicator Lights: Several indicator lights provide crucial information regarding the wash cycle status – wash, rinse, and dry – ensuring you’re always informed about the dishwasher’s progress. The LED display simplifies monitoring and control.
Wash Cycle Selection (6 Settings)
Optimizing Your Wash: Your Danby dishwasher offers six versatile wash cycles designed to handle diverse dishwashing needs. The Normal cycle is ideal for everyday loads with moderate soil levels, utilizing approximately 3.1 gallons of water. For heavily soiled items, the Heavy cycle provides a more intensive cleaning action.
Delicate & Efficient Options: The Delicate cycle gently cleans fragile glassware and items, while the Eco cycle maximizes water and energy efficiency. A Quick Wash cycle offers a shorter cleaning duration for lightly soiled dishes.
Specialized Cleaning: Finally, the Glass cycle is specifically designed for sparkling clean glassware, minimizing the risk of spotting or damage. Carefully consider the load type and soil level when selecting the appropriate cycle for optimal results and resource conservation.
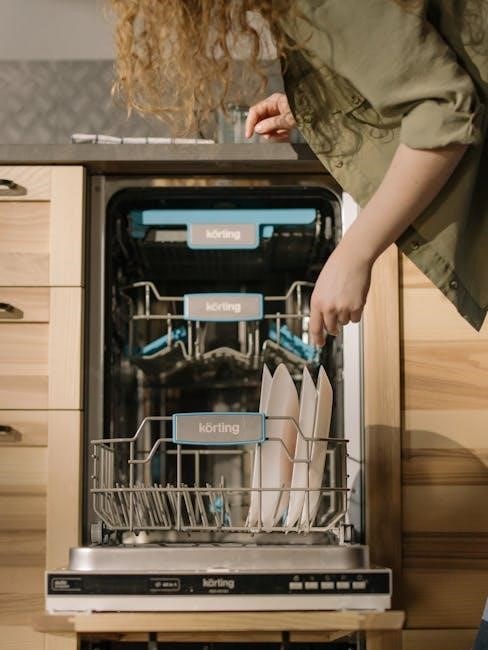
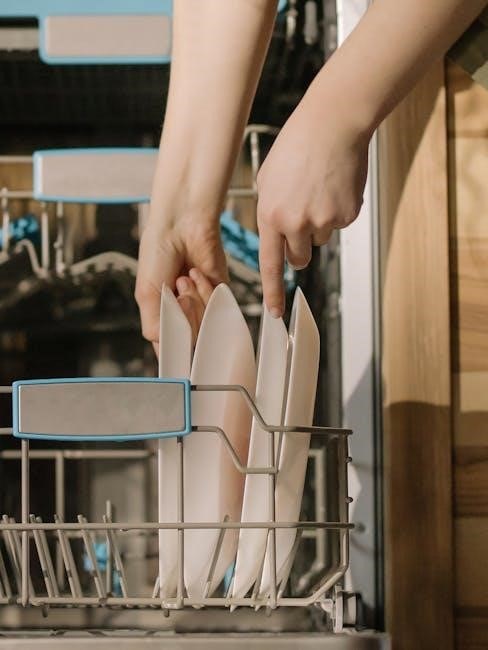
Loading the Dishwasher Correctly
Maximize Cleaning Performance: Proper loading is crucial for achieving optimal cleaning results. Ensure dishes aren’t overcrowded, allowing water to reach all surfaces. Place larger items along the sides and back, avoiding obstruction of the spray arms.
Strategic Placement: Load plates and bowls facing the center, and ensure silverware is placed in the designated basket with handles down for thorough cleaning. Delicate glassware should be secured in the upper rack to prevent breakage.
Avoid Obstructions: Avoid nesting dishes or stacking items, as this hinders water circulation. Check spray arm rotation after loading to confirm unobstructed movement. Incorrect loading can lead to poorly cleaned dishes and reduced dishwasher efficiency. Prioritize proper arrangement for sparkling results!
Detergent & Rinse Aid Usage
Optimal Cleaning Power: Use only dishwasher detergent specifically designed for automatic dishwashers. The amount of detergent needed varies based on water hardness and soil level; consult the detergent packaging for guidance. Avoid using hand dish soap, as it creates excessive suds.
Rinse Aid Benefits: Rinse aid significantly improves drying performance and prevents water spots. Fill the rinse aid dispenser regularly to ensure spotless results. Adjust the rinse aid level based on your water hardness – higher hardness requires a higher setting.
Proper Dispensing: Ensure both detergent and rinse aid dispensers are securely closed after filling. Using the correct amount of each product optimizes cleaning and protects your dishwasher from potential damage. Always follow product instructions carefully.

Maintenance & Troubleshooting
Keep it Clean! Regular maintenance, including filter cleaning and spray arm inspection, ensures peak performance. Address error codes promptly for optimal operation.
Cleaning the Filter System
Maintaining a clean filter is crucial for your Danby dishwasher’s performance. Food particles and debris can accumulate, hindering water circulation and potentially causing clogs. This leads to reduced cleaning effectiveness and can even damage the dishwasher over time.
To clean the filter, first, disconnect the power to the dishwasher. Locate the filter assembly, typically at the bottom of the dishwasher’s interior. Carefully remove the filter components – usually a coarse filter and a fine filter.
Rinse the filters thoroughly under running water, using a soft brush to remove stubborn residue. Avoid using harsh detergents or abrasive cleaners, as these can damage the filter material. Inspect the filters for any signs of damage, such as cracks or tears, and replace them if necessary.
Reassemble the filter components correctly and securely place them back into the dishwasher. A properly cleaned and maintained filter ensures optimal cleaning performance and extends the life of your Danby dishwasher.
Cleaning the Spray Arms
Regularly cleaning the spray arms is essential for maintaining optimal dishwasher performance. Over time, food particles and mineral deposits can clog the spray arm nozzles, reducing water pressure and hindering effective cleaning. This can result in dishes not being thoroughly washed and potentially leaving residue.
To clean the spray arms, first, disconnect the power to the dishwasher. Locate the upper and lower spray arms – they are typically removable by unscrewing or unclipping them. Carefully remove the spray arms and inspect the nozzles for any blockages.
Use a toothpick or small wire to gently clear any clogged nozzles. Rinse the spray arms thoroughly under running water to remove any dislodged debris. Inspect the spray arms for any cracks or damage and replace them if necessary.
Reattach the spray arms securely, ensuring they rotate freely. Clean spray arms guarantee even water distribution, leading to sparkling clean dishes with every wash cycle in your Danby dishwasher.

Addressing Common Error Codes
Danby dishwashers utilize error codes to signal malfunctions, aiding in quick troubleshooting. Encountering an error code doesn’t automatically necessitate a service call; often, simple solutions can resolve the issue. Consult your specific model’s documentation for a complete list, as codes vary.
A common code, “E1,” often indicates a water inlet issue – check the water supply valve is fully open and the hose isn’t kinked. “E2” typically signals a drainage problem; inspect the drain hose for obstructions and ensure the drain pump isn’t blocked.
If you see “E3,” this usually points to a temperature sensor fault. Contact customer support for this one. For “E4,” a heating element problem is suspected. Always disconnect power before inspecting any internal components.
Resetting the dishwasher by unplugging it for a few minutes can sometimes clear minor errors. If the error persists, record the code and contact Danby customer support for expert assistance, providing your model number for efficient diagnosis.
Winterizing Your Danby Dishwasher
Protecting your Danby dishwasher during freezing temperatures is crucial to prevent damage. If your dishwasher is in an unheated space, or temperatures regularly drop below freezing, proper winterization is essential. Begin by disconnecting the water supply line to the dishwasher.
Next, carefully drain all remaining water from the dishwasher, including the spray arms and the sump area. Use a wet/dry vacuum to remove any residual water. Pour a generous amount of RV antifreeze (propylene glycol-based) into the dishwasher’s drain pump and run a short cycle to distribute it throughout the system.
This antifreeze prevents freezing and cracking of pipes and components. Ensure the antifreeze is safe for plumbing systems. Finally, leave the dishwasher door slightly ajar to allow for air circulation. Repeat this process annually before the onset of freezing weather to maintain optimal functionality.

Specific Model Information
Explore detailed specifications for popular Danby models like the DDW621WDB (6 place settings) and the DDW1805EWP (18” model), alongside 24” dishwasher overviews.
Danby DDW621WDB – 6 Place Setting Model
Compact and Efficient: The Danby DDW621WDB is a countertop dishwasher designed for smaller kitchens or individuals seeking a convenient washing solution. This model boasts a six-place setting capacity, making it ideal for couples or small households. It’s remarkably water-efficient, utilizing only 3.1 gallons (11.7 liters) per normal cycle – a significant saving compared to handwashing or larger dishwashers.
User-Friendly Controls: Operation is simplified through an electronic LED display, allowing for easy programming and monitoring of the six available wash cycles. These cycles cater to various cleaning needs, from delicate glassware to heavily soiled pots and pans. Its compact size doesn’t compromise functionality, offering a practical and space-saving appliance. This dishwasher provides a stylish and effective cleaning solution for everyday use.
Danby DDW1805EWP – 18” Model
Space-Saving Design: The Danby DDW1805EWP is an 18-inch wide dishwasher, perfectly suited for apartments, condos, or kitchens where space is at a premium. Despite its compact size, it delivers powerful cleaning performance and accommodates a substantial amount of dishes. This model offers a balance between efficiency and capacity, making it a versatile choice for various households.
Feature-Rich Operation: While specific cycle details require consulting the full manual, the DDW1805EWP is designed for user convenience. Expect multiple wash cycles to handle different soil levels and dish types. Its construction focuses on durability and reliable operation, ensuring years of dependable service. This 18-inch dishwasher provides a practical and efficient solution for keeping your kitchen clean without sacrificing valuable space.
Danby 24” Dishwasher Models – Overview
Enhanced Capacity & Features: Danby’s 24-inch dishwasher models represent a step up in capacity and functionality compared to their 18-inch and countertop counterparts. These dishwashers are designed to seamlessly integrate into standard kitchen cabinetry, offering a full-sized cleaning solution without requiring extensive kitchen renovations. Expect a wider range of wash cycles, including heavy-duty, normal, and delicate settings, catering to diverse cleaning needs.
Advanced Control & Efficiency: Typically, 24-inch Danby dishwashers feature electronic LED displays for precise cycle selection and monitoring. Many models prioritize water and energy efficiency, helping to reduce utility bills and minimize environmental impact. Features like adjustable racks and specialized spray zones further enhance cleaning performance and accommodate various dish sizes and shapes. Consult the specific model’s manual for detailed specifications and operational instructions.

Warranty Information & Support
Danby provides comprehensive warranty coverage on its dishwashers, protecting against manufacturing defects. For assistance, or to understand your coverage, contact Danby customer support directly.
Danby Warranty Details
Danby dishwashers are covered by a limited warranty, designed to protect you against defects in materials and workmanship. The standard warranty period is typically one year for parts and labor, commencing from the original date of purchase. This coverage applies to dishwashers used under normal residential conditions.
Specifically, the warranty encompasses issues arising from faulty components or assembly errors. However, it does not cover damage resulting from misuse, improper installation, accidents, or unauthorized repairs. Cosmetic damage, such as scratches or dents that don’t affect functionality, may also be excluded.
To make a warranty claim, you must provide proof of purchase (receipt or invoice) and a detailed description of the problem. Danby may require the defective part for inspection. Warranty service is typically performed by authorized Danby service centers. Modifying the appliance or using non-genuine Danby parts will void the warranty. Always register your product online for faster service!
Contacting Danby Customer Support
For assistance with your Danby dishwasher, several support channels are available. The Danby customer support team is equipped to handle inquiries regarding operation, troubleshooting, warranty claims, and parts replacement. Prompt and efficient service is their priority.
You can reach Danby via phone during business hours – typically Monday to Friday. Check the official Danby website (Danby.com) for the most up-to-date contact number, as it may vary by region. Alternatively, you can submit a support request through the online form on their website.
Email support is also offered, providing a convenient way to describe your issue in detail and attach relevant documentation, such as photos or videos. When contacting support, have your model number and serial number readily available to expedite the process. Danby also maintains a comprehensive FAQ section on their website, which may answer your question immediately.